Adding notes to a QBR report
NAVIGATION QBR Report Builder > (add or edit a report) > Add > Notes
Business notes in the QBR Report Builder help MSPs bridge the gap between technical data and executive understanding by adding human context, strategic insights, and clarity to every QBR report. Refer to Using the QBR Report Builder.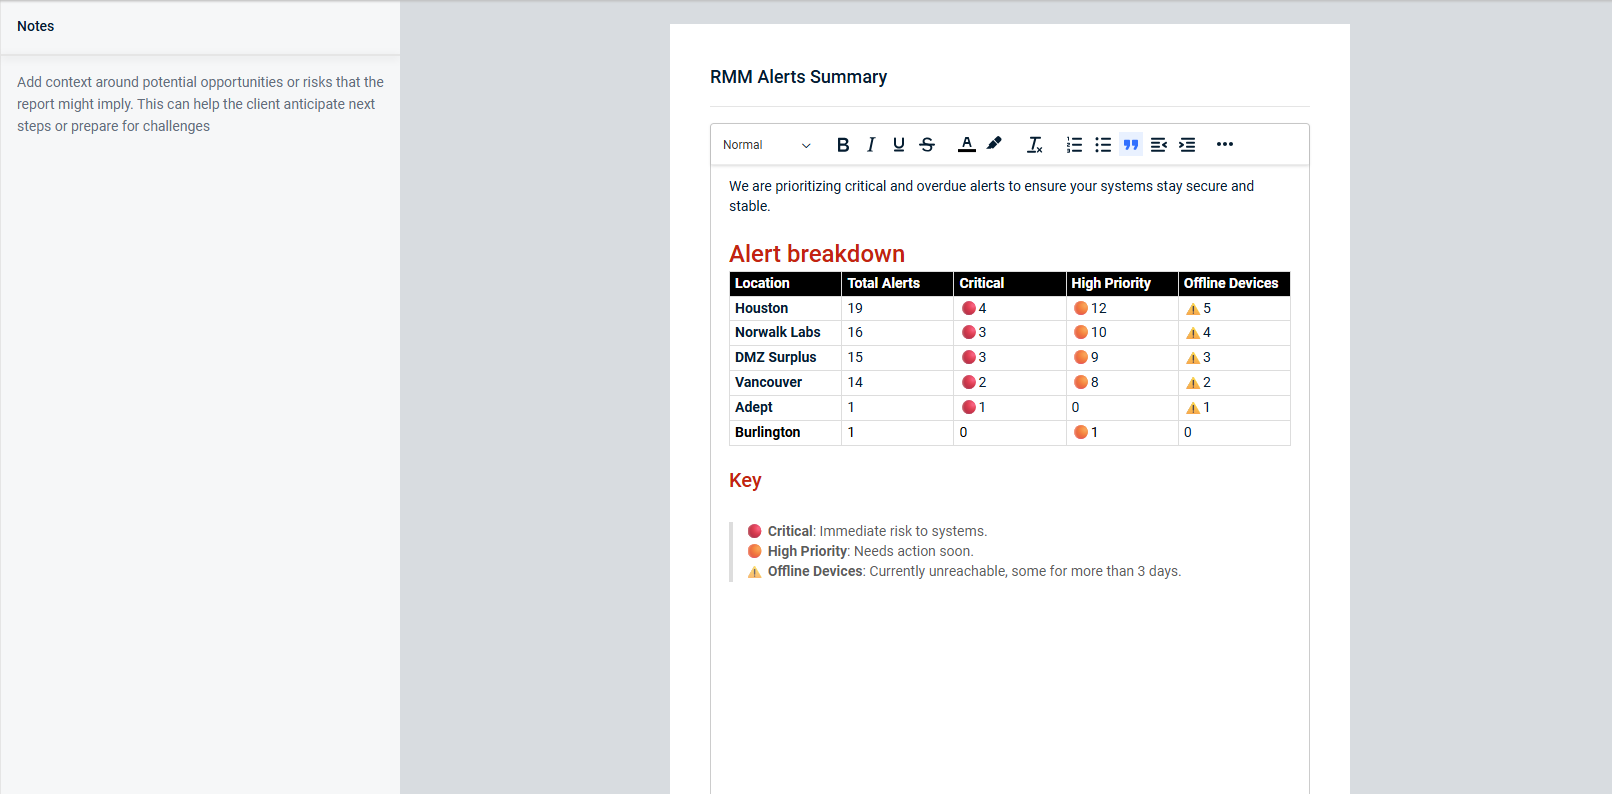
TIP After adding the Notes section to a QBR report, you may want to rename the section to better reflect the details you are covering, as the section name appears as the title of the notes page in the generated QBR report. To change the default section name (Notes) to a different name, hover over the section in the Table of Contents pane and click the pencil icon ![]() .
.
Behavior
- Each note supports up to 20 MB of content. If your content exceeds this limit, split it across multiple notes within the report.
- When you copy and paste content into a note, its original formatting is preserved automatically.
Formatting toolbar
The toolbar above the note text area provides options for formatting text, tables, and images in the note, including the following:
| Icons | Options |
|---|---|

|
Add headings. |

|
Bold, italicize, underline, or strike through text. |

|
Color or highlight text. |
|
|
Clear applied formatting. |

|
Add numbered or bulleted lists. |

|
Stylize quotes and callouts with built-in blockquote formatting. |

|
Incrementally indent text. |

|
From three-dot menu |

|
Align text. |

|
Undo or redo actions in the text area. NOTE Undo/redo keyboard shortcuts are also supported (Ctrl+Z/Ctrl+Y on Windows and Command+Z/Command+Shift+Z on macOS). |

|
Insert images. Refer to Add an image. |
| Icons | Insert tables. Refer to Add a table. |

How to...
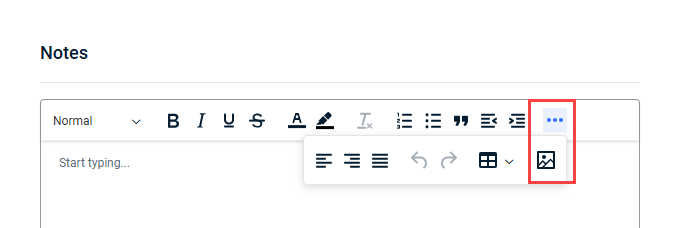
You can add images to your notes in the following ways:
- Copy the image and paste it directly into the text area.
- From the three-dot menu in the toolbar, click the image icon to upload a file saved to your device.
Tables can help organize your note content more effectively.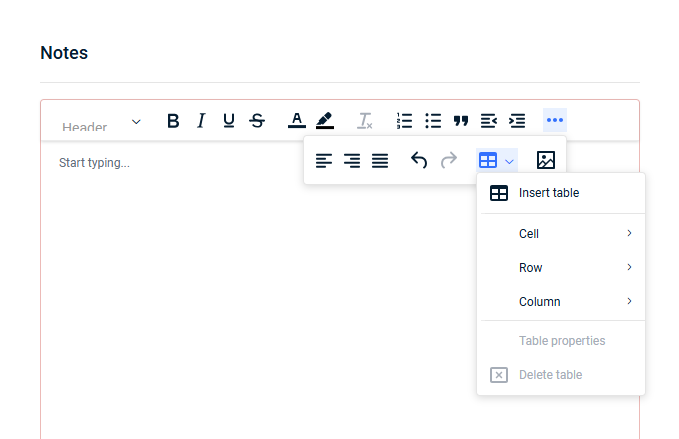
Complete the following steps to insert and format a table in a QBR report note:
- Click the text area.
- Click the three-dot menu in the toolbar.
- From the table drop-down menu, select Insert table.
- Enter the desired number of rows and columns.
- Click OK.
- Populate content in the table cells. You can insert new rows and columns or delete rows and columns from the table drop-down menu as needed.
- To format the overall table design, click anywhere in the table and select Table properties from the table drop-down menu.
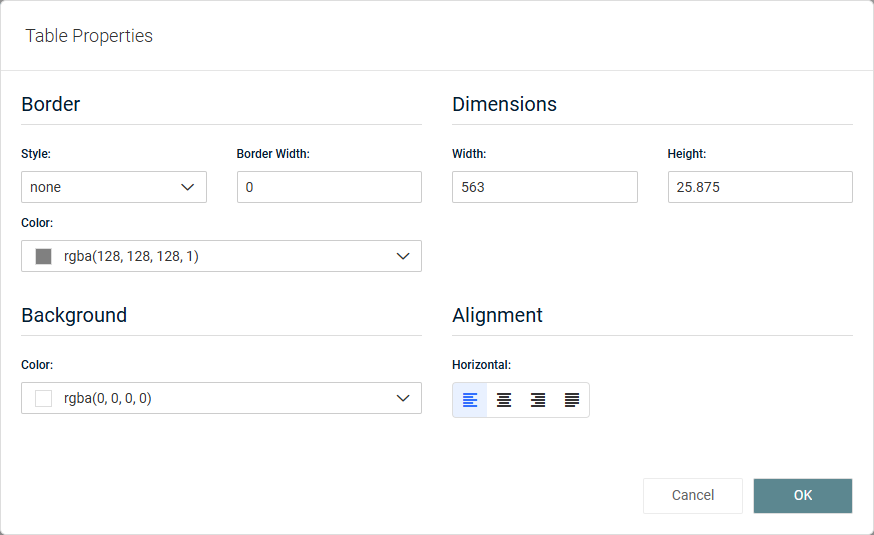
From here, you can do the following:- Format the table border style, width, and color.
- Specify the height and width of all cells.
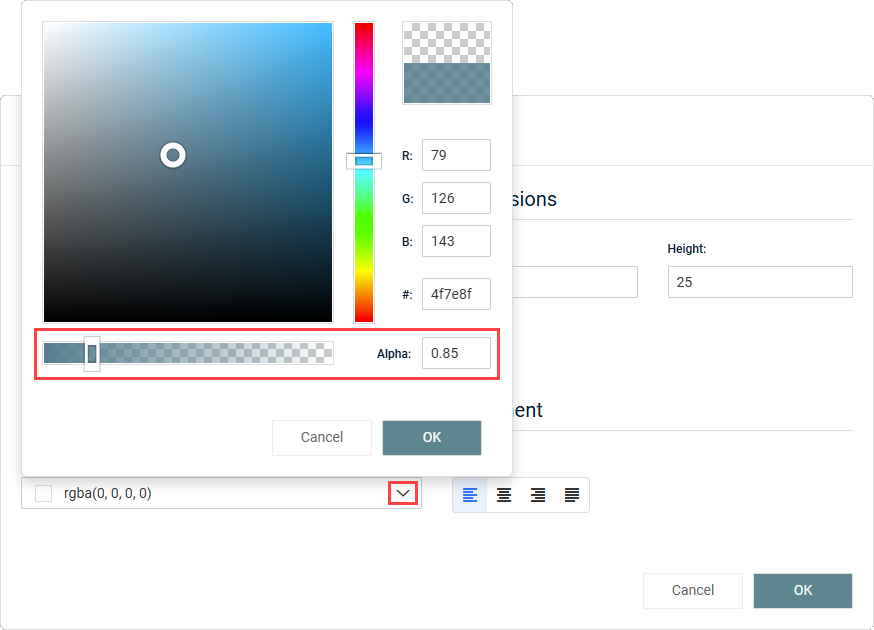
- Apply a background color to all cells (instead of white). When selecting the color, adjust the Alpha value (on a scale of 0 to 1) to control the intensity and saturation of the shade applied to the table. You can click and drag the color scale bar to choose the desired look.
- Configure the text alignment in all cells.
NOTE If the Alpha value is 0, the selected color will appear as white.
- To format a specific cell, row, or column, click into the cell or click and drag multiple cells. From the table drop-down menu, select Cell > Cell properties.
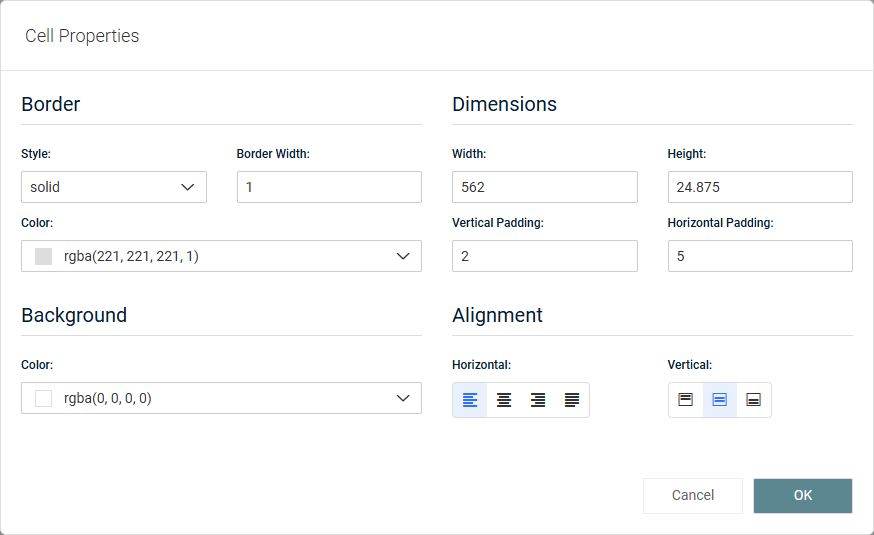
From here, you can do the following:- Format the border style, width, and color of the selected cell(s).
- Specify the height, width, and padding of the selected cell(s).
- Apply a background color to the selected cell(s) (instead of white). When selecting the color, adjust the Alpha value (on a scale of 0 to 1) to control the intensity and saturation of the shade applied to the cell(s). You can click and drag the color scale bar to choose the desired look.
- Configure the text alignment in the selected cell(s).
NOTE If the Alpha value is 0, the selected color will appear as white.
Complete the following steps to delete a table in a QBR report note:
- Click anywhere in the table.
- Click the three-dot menu in the toolbar.
- From the table drop-down menu, select Delete table.


